Easily install your Dark Horse style front bumper with LMR's easy-to-follow installation instructions.
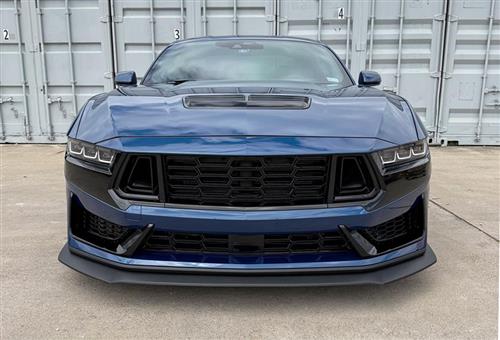
Purchase 2024-2026 Mustang Dark Horse Bumper
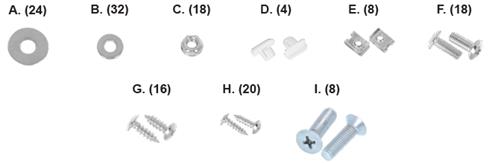
Hardware Key
Installation Instructions
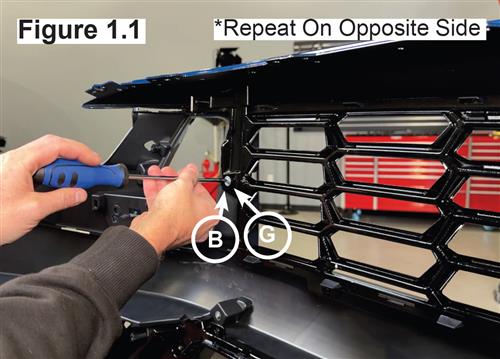
*Moderate pressure may be required to ensure all component locking tabs are fully seated and properly engaged.- Install the upper grille to the bumper using two (2) “B” small washers and two (2) “G” large self-tapping screws, securing them into the pre-drilled holes located on each side of the grille, and tighten until secure without overtightening. (See Figure 1.1)
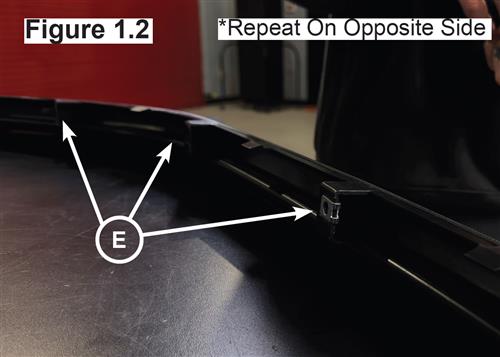
- Install six (6) “E” speed clips onto the chin splitter, then align and snap the chin splitter securely into the bumper. (See Figure 1.2)
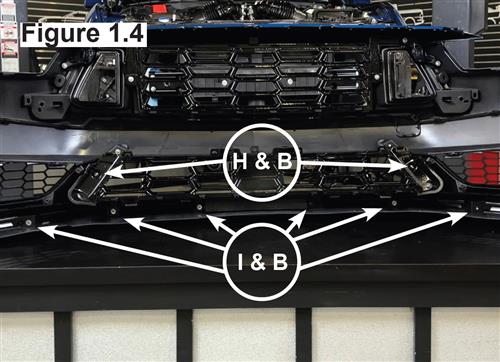
- Using two (2) “I” screws and two (2) “B” washers, secure them through the outer screw holes located beside the lower grille and tighten. (See Figure 1.4)
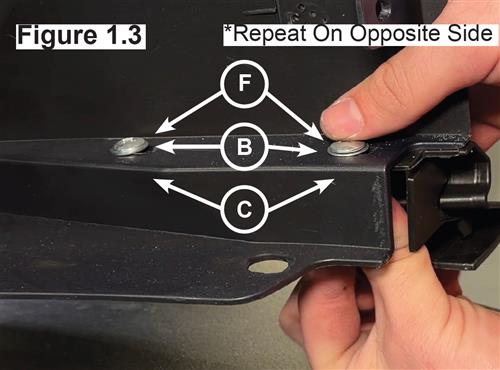
- Using four (4) “F” screws, four (4) “B” washers, and four (4) “C” nuts, secure the outer chin spoiler mounting points (See Figure 1.3)
- Install the lower grille, then secure it using four (4) “I” screws and four (4) “B” washers in the lower mounting holes of the grille, and two (2) “H” screws with two (2) “B” washers on the side mounting points of the grille, tightening all hardware until properly fastened. (See Figure 1.4)
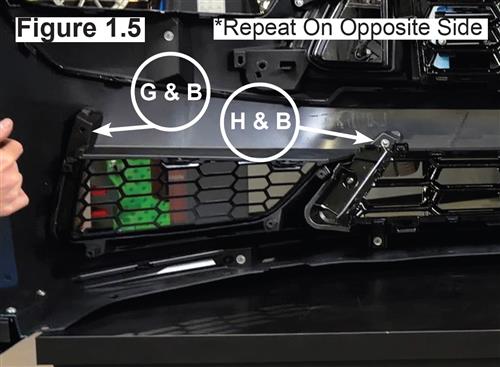
- Install the LH and RH lower corner grilles. Secure the outside mounting hole using one (1) “G” self-tapping screw with one (1) “B” washer, and the inside mounting hole using one (1) “H” self-tapping screw with one (1) “B” washer. (See Figure 1.5)
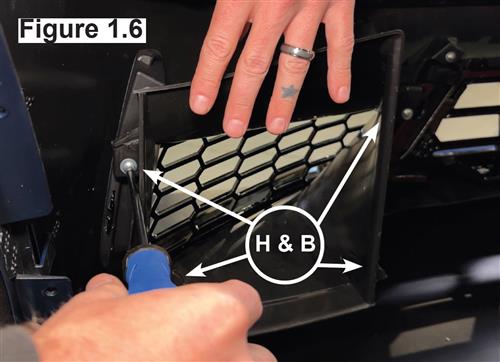
- Install the LH air duct using four (4) “H” self-tapping screws and four (4) “B” washers. (See Figure 1.6)
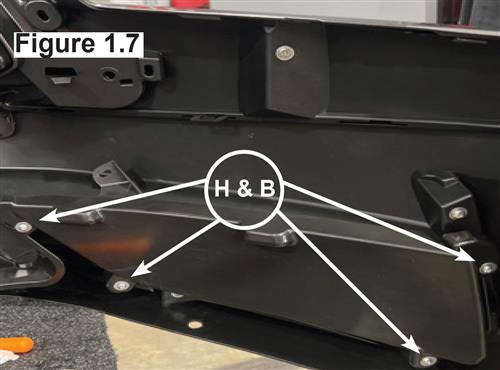
- Install the RH washer reservoir block-off plate using four (4) “H” self-tapping screws and four (4) “B” washers. (See Figure 1.7)
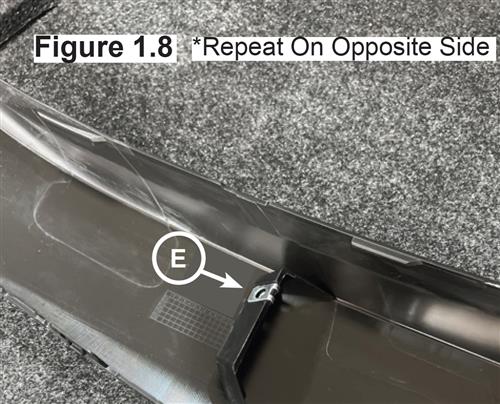
- To install the LH and RH under-headlight trim pieces, Secure each trim piece using one (1) “E” speed clip. (See Figure 1.8)
- Place and secure the LH and RH headlight trim pieces using one (1) “I” bolt and one (1) “B” washer per side, threading into the installed speed clip. (See Figure 1.9)
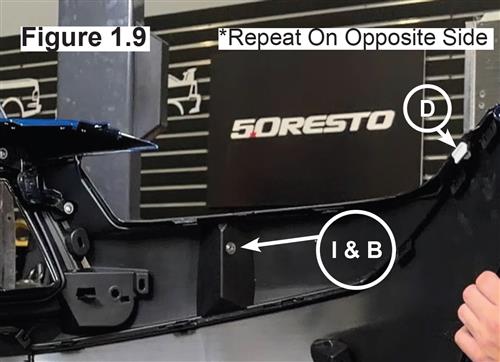
- Install one (1) white “D” clip into the top of each headlight trim piece (one per side). (See Figure 1.9)
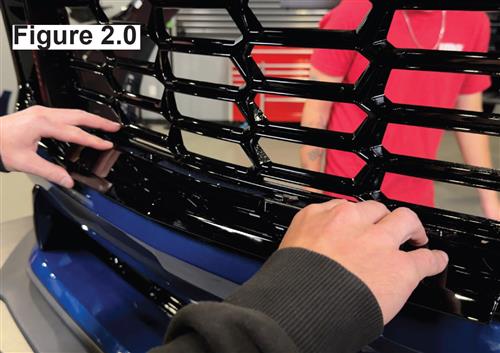
- Clip in the middle trim piece connecting both headlight trim pieces. (See Figure 2.0)
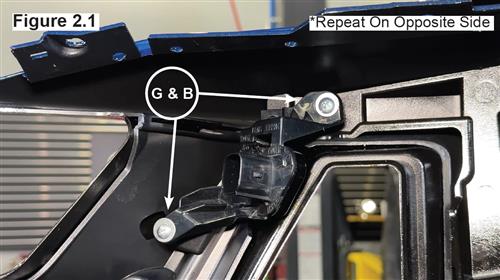
- (If equipped): Install the LH and RH upper grille corner lights using two (2) “G” self-tapping screws and two (2) “B” washers per side. (See Figure 2.1)
- Install the side marker lights, ensuring they are properly seated into their mounting locations.
- Install upper bumper Brackets.
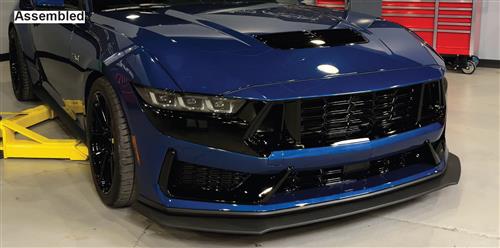
- Reinstall the fully assembled bumper onto the S650 Mustang, ensuring all mounting points are properly aligned and securely fastened.
* Not all hardware included will be used.
* This Dark Horse bumper is designed to accommodate the M17750A crash bar & tow hook kit, which fits the tow hook access opening. For more information, refer to the product page.