About the Video
2005-2009 Mustang Trunk Release Button - Review & Install
Check out our YouTube channel for even more tech tips, installation videos, how-tos, and more. The best place to go for anything Mustang related!
Published on 2017-02-06
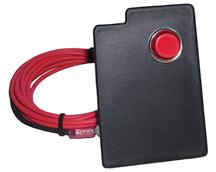
For some odd reason, Ford did not include a trunk release button in 2005-2009 Mustangs. This meant you relied on your key fob, or the key itself, to be on you at all times. Starkey Products stepped up to make this easy to install kit so you can add a trunk release button to the interior of your S197! This kit seamlessly integrates into your Mustang's console for a factory fit and finish! This kit includes a trunk release switch panel, complete wiring harness and installation hardware. No cutting and no drilling make this a quick and easy installation!
Features:
-Seamless Integration
-Mounts In Center Console For Easy Access
-Easily Identifiable Red Trunk Button
Installation Note:
On some 2007-Early 2008 Mustangs, Ford varied the wire colors. Refer to the Smart Junction Box diagram below to locate the C2280C connector, and then pin #21. The color of that connector will be the wire you tap into.
Mustang Fitment: 2005-2009
Item # STY-3475
Transcript
How’s it going everybody? Landan with Late Model Restoration. This video will cover my quick overview and install on this trunk release button kit from Starkey Products fitting all 2005 to 2009 Mustang.
If you own a 2005 to 2009 Mustang then you are more than likely familiar with the frustration of not having a trunk release button inside of the car. Ford remembered to put it on the key fob, but somehow throughout the 2005 to 2009 model years they totally forgot to put a button inside of the car. Beats me!
If you’re wanting to add the convenience of a trunk release button inside the car, then you should definitely consider this kit from Starkey Products. It features a seamless integration into the center console for easy access and factory-like fit and finish. The face-place is textured plastic to mimic the factory inner-console trim and also has an easy identifiable red push button that triggers the trunk release mechanism.
There is no drilling or cutting required, and installation can be done in no time at all. You will need a little bit of knowledge pertaining to electrical systems especially if you own a 2007 or early 2008 model Mustang.
In rare instances, Ford altered the wire colors for some 2007 and early 08 models. Unfortunately, this is something you won’t know until you begin the install. The good news though, it’s very easy to determine the correct wire and color that needs to be spliced with supplied Scotch locks.
To begin, disconnect the negative battery cable.
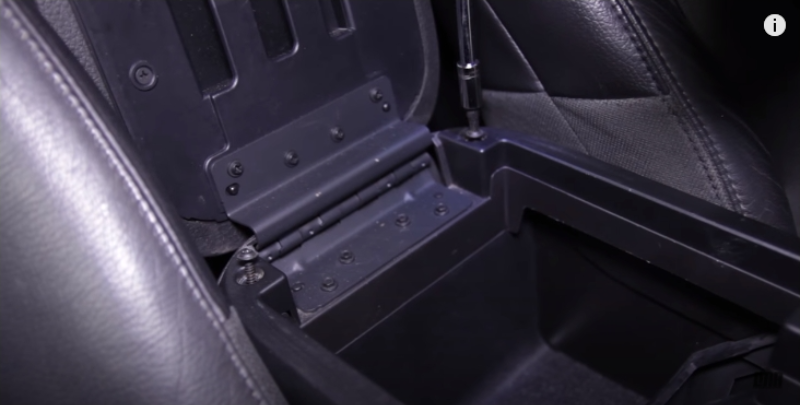
Inside the car, open the center console and locate the two rear Phillips head screws.
Remove these screws and set them aside.
Pull the emergency brake handle up as far as reasonably possible in order to have enough clearance to remove the center console panel.
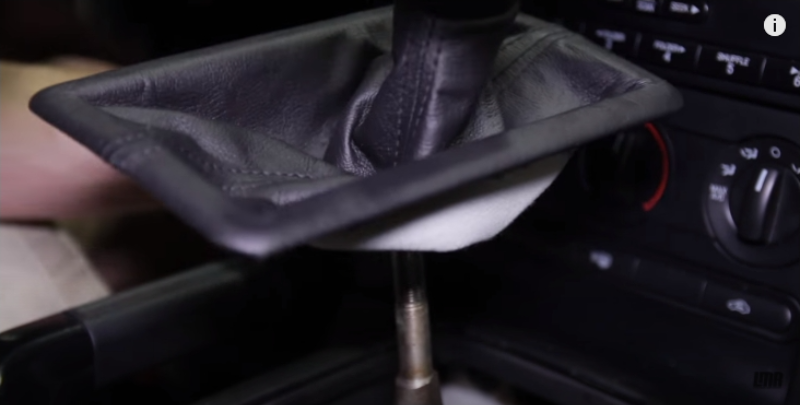
If you own a manual Mustang, unscrew and remove the shift knob.
Now, pry up on the bezel if you have an automatic car or the shift boot if you have a manual car, and then set these components aside.
Carefully lift up on the console to release all of the clips holding it down.
Then manipulate the console out of the car and set it aside.
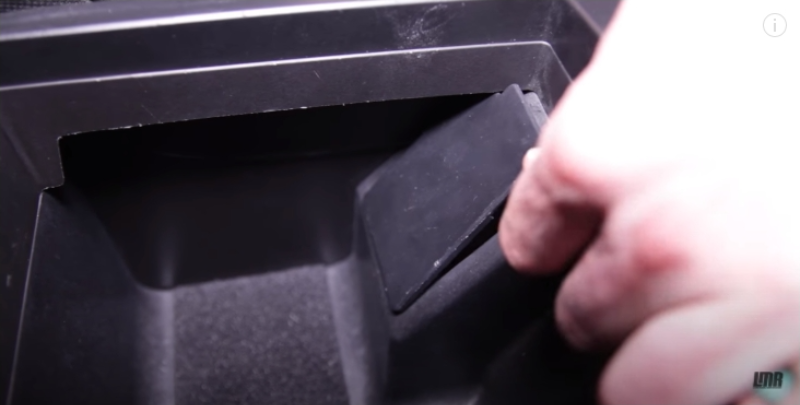
Inside of the center console remove the emergency brake access cover with a small plastic pry tool or a screwdriver wrapped in a microfiber towel.
Take the provided cover with push button and route the wires through the hole.
Then snap the cover into place.
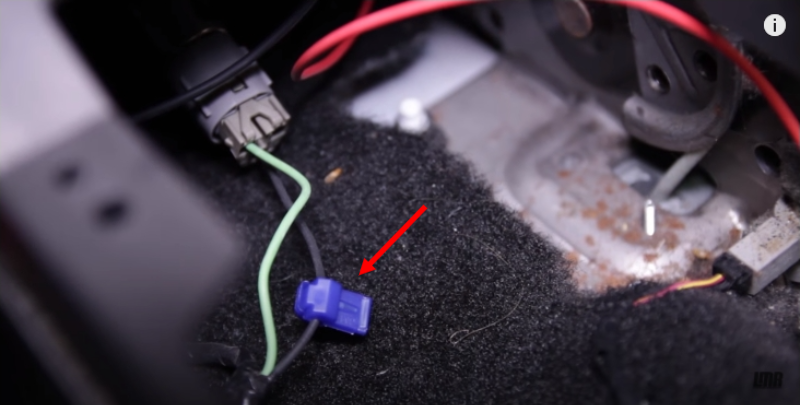
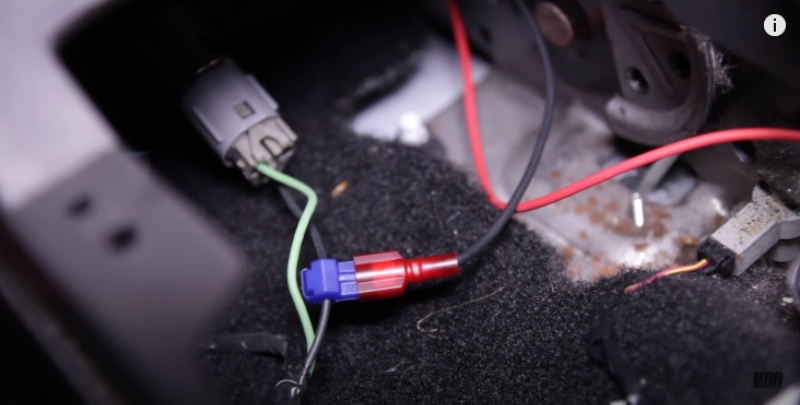
Locate the green with black stripe wire running under the cup holder area.
This wire plugs into the 12 volt power supply located in the center console.
Using the supplied blue Scotch lock, slide the black wire into the Scotch lock.
This should sit in the middle of the two teeth.
Carefully squeeze down on the wire tap and make sure it snaps closed.
If necessary, use a pair of pliers to squeeze the Scotch lock closed.
Plug the black wire from the button wiring into the back of the blue Scotch lock.
Use one of the provided zip-ties to secure the wiring away from the emergency brake assembly.
Route the red wire down the passenger side of the center console until you reach the shifter.
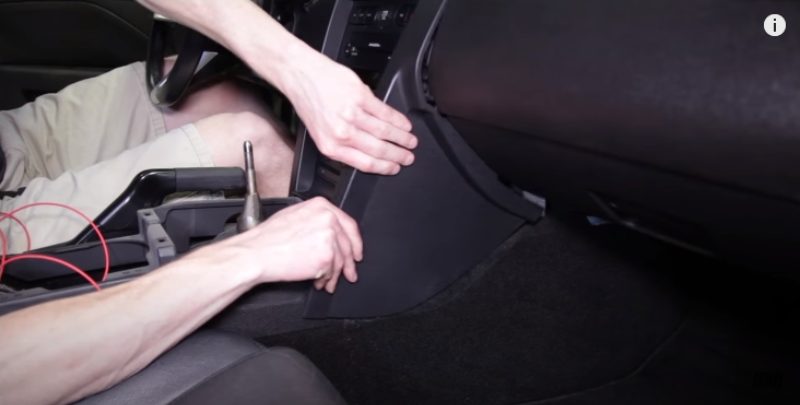
Remove the trim panel to the right of the radio.
To do this, gently pull the panel straight out.
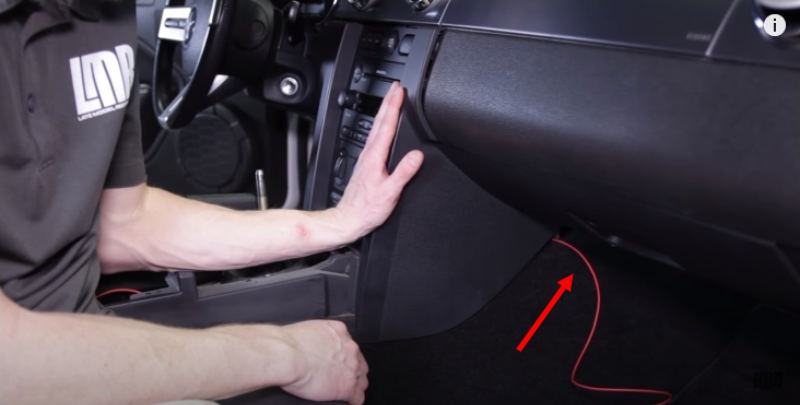
Now route the red wire toward the glove box.
You can go ahead and reinstall the trim piece you just removed.
Finish routing the red wire across the back of the glove box.
Go ahead and carefully pry up on the scuff plate so you can pull back the carpet.
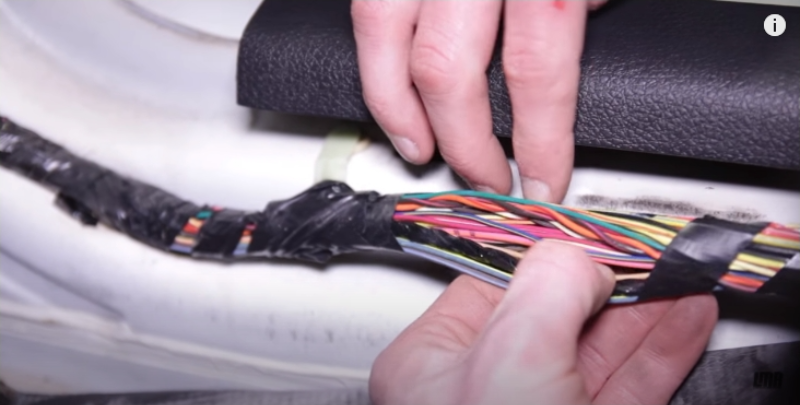
Locate the bundle of wires and trim back some of the electrical tape.
Before continuing, I want to make note of a few things.
Overtime, colors can bleed together making the wires hard to differentiate from each other.
Also, depending on the features of your car, there may be two wires of the same color.
If this happens, make a mental note to yourself that you will always be tapping into the smaller of the two wires which is usually 22 gauge.
Using the supplied red Scotch lock, slide the thin white wire with pink stripe into the Scotch lock.
Squeeze down on the Scotch lock making sure it snaps closed.
A pair of pliers may be needed to do this.
Like I stated previously, Ford varied the wire color on 2007 and early 08 models.
If the white with pink stripe wire is not there, try and locate the orange wire with pink stripe.
If that color combination is not there either, a few extra steps are needed.
Remove the passenger side kick panel and then unbolt the Smart Junction Box.
Locate the C2280C connector.
On this connector, locate pin number 21.
Disconnect the C2280C connector from the Smart Junction Box and de-pin the harness.
Locate pin 21. In our case, it's an off-white wire with pink stripe.
This is the wire color that is needed for 2007 and early 08 models that do not have the white with pink stripe or orange with pink stripe wires.
Use the provided Scotch-Lock to tap the correct wire from pin 21.
Then plug in the red wire from the trunk release button.
Now you can finish routing the red wire down the scuff plate and plug it into the Scotch lock.
Reconnect the negative battery cable and test for operation.
Once that is complete, make sure and position the red wire away from the glove box assembly.
Position the red wire behind the kick panel so it is out of view.
Take this time to zip-tie the red wire out of the way and secure any remaining wire together.
Use a few more zip-ties for the wires in the middle console and near the emergency assembly.
Reassemble your interior components in reverse order.
Double check your work and you’re all finished.
For the most part guys, this is very straightforward, but can require a few extra steps if you have a 2007 or early 2008 model Mustang. All in all, set aside about an hour of your time to get this knocked out. Regardless, this trunk release kit is the perfect addition to every 2005 to 2009 S197 Mustang.
To see more great products for your S197 Mustang, subscribe to our YouTube channel if you haven’t already done so. While you’re at it, go ahead and pick up this trunk release button kit for your 2005 to 2009 Mustang from the real Mustang enthusiasts, LMR.com!