About the Video
How To Replace Fox Body Mustang T-Top Weatherstrip (1981-1988)
Check out our YouTube channel for even more tech tips, installation videos, how-tos, and more. The best place to go for anything Mustang related!
Published on 2019-02-26
1981-1988 Mustang T-Top Weatherstrip.
Fox Body Mustang t-top weatherstripping is often found dry-rotted and worn from age and continuous removal of the t-top glass. The main weatherstripping is constructed from OE-grade EPDM rubber and molded with close tolerances to ensure a great fit onto your Fox Body. Both the latch seals and retainer padding are made from foam just like the factory pieces. Enough rivets are included to properly retain the frontward and rearward t-top assembly moldings to the roof of the car.
T-Top Differences.
To determine the build date of your Mustang, please refer to the date on the upper left corner of your VIN sticker located in your driver door jamb. If a VIN sticker is not available, please refer to the following measurements. These measurements reference the length of the pillar-post portion of the t-top weatherstrip.
Fitment Notes:
- 1981-1984 (built before 10/83) - 38"
- 1984 (built from 10/83)-1986 - 26"
- 1987-1988 - 30"
- Some early 1981-82 T-top Mustangs had a pillar length of approximately 23". For these applications, it would be best to use the 1984-86 weatherstrip and glue down the extra 3" of weatherstrip.
Applications: 1981-1988 Mustang w/ T-Top
Transcript
How’s it going everyone? Landan with lmr.com! In this video I’ll be briefly discuss our t-top weatherstrip selection and of course provide everyone with a general walk-through on how to replace their t-top weatherstrip.
The t-top option on Fox Mustangs was offered from 1981 to 1988 and in typical Ford fashion, they had three different year-breaks throughout the t-top era.
These year-breaks include 1981 to 1984 and cars built before October of 1983, 1984 to 1986 with the ’84 cars being built from October of 1983, and the last year-break was 1987 to 1988.
All of this craziness stems from the overall length of the a-pillar weatherstrip. The breakdown in lengths are as follows: 81 to 84 cars had a 38 inch a-pillar weatherstrip length, 84 to 86 cars had a 26 inch a-pillar length and 87 to 88 cars had a 30 inch a-pillar length.
With further research of t-top cars, we found that some early 1981 to 1982 t-top cars had a weird 23 inch a-pillar length, so it’s probably in your best interest to use the kit intended for the 1984 to 1986 cars.
All of the other weatherstripping and components related to t-top cars is the exact same… thank goodness!
5.0 Resto’s t-top weatherstrip kits includes all of the weatherstrip associated with the body-side of the car and of course the t-top glass. These pieces involve the left and right-hand t-top to body weatherstrip, left and right-hand t-top to door glass weatherstrip, (2) t-top latch seals, (2) beaded felt weatherstrips, (1) roll of body to frame seal and (16) pop rivets to reinstall the roof moldings.
All of this weatherstrip is manufactured from OE-grade EPDM rubber so it will live up to a long service life and it’s also all available in individual components. Of course the t-top latch handle seals are constructed from foam and the beaded felt weatherstrips are metal banded just like the factory for added structure.
When replacing the t-top weatherstrip, it’s also going to be in your best interest to replace the door to body weatherstrips as well. They are available separately and will need to be trimmed to fit.
Tools
Before you replace your t-top weatherstrip, you will need an assortment of tools and supplies to get the job done.
These include a nice rivet gun, plastic scrapers and pry tools, paint-safe adhesive remover, a good weatherstrip adhesive, black silicone rubber, rust preventive paint for anyone that may have concern with rusting, trim paint, some microfiber and shop towels for cleanup, a vacuum, compressed air, razor blades, some 1/4 inch butyl tape, alcohol, bar clamps, a soft mallet and of course a few other common hand tools.
Before I begin, I want to make note of a things… This ’86 Capri is without a doubt a work in progress. You guys will see several things that need to be addressed with this car. We’ll eventually get to them, but for this video I am going to be focusing on t-top weatherstrip replacement.
Depending on how detailed you want to be and your experience with intricate weatherstrip; this process could take more than a day to complete. More than likely it will cause some frustration, just take your time and work through any hiccups you run across.
One additional item that will be beneficial prior to installation of these components is our t-top repair guide. This thing is packed full of quality information, tips and tricks for all things related to the t-top Fox Bodys.
If you have an interior that you’re proud of, I would recommend putting some drop cloth over anything you don’t want to get dirty or dusty.
This job can and will be messy.
Remove the t-top glass from both sides.
Remove the frontward plastic trim.
It’s held in place with (3) Phillips head screws.
Remove the rearward trim as well; it’s also held in place with (3) Phillips head screws.
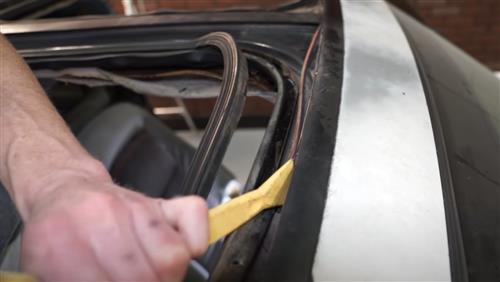
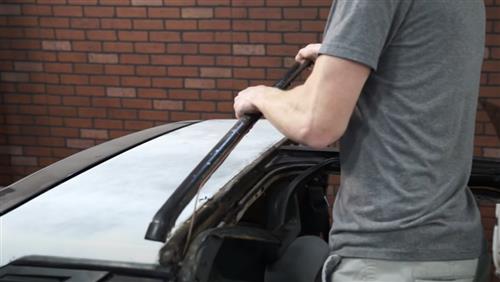
Beginning, at the a-pillar remove the weatherstrip from the c-channel
Work your way up the a-pillar and then around the t-top opening.
Remove it from the b-pillar and then dislodge the push pin.
Do this for both sides.
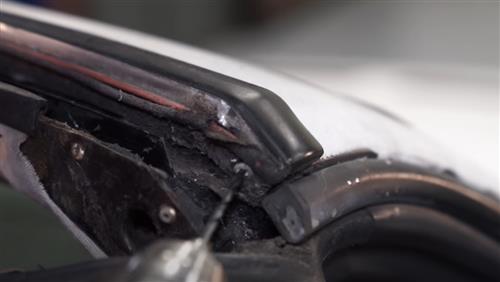
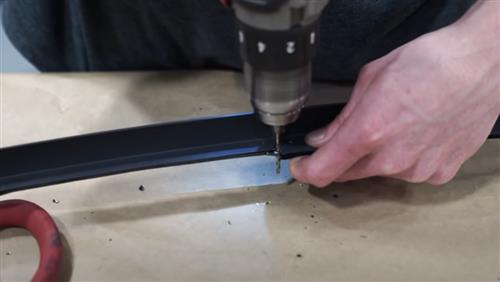
Locate and carefully drill out all of the rivets securing the felt weatherstrips and frontward roof molding. Use an 1/8” drill bit for this.
There are (4) rivets on the passenger side and (4) on the driver side.
Be careful not to drill too aggressively and be mindful of the surrounding area.
Remove the old felt weatherstrip with a plastic pry tool then remove the trim piece.
This can also come off as one piece and you can remove the felt off of the car.
Whichever way works fine.
Do the same for the rearward roof molding.
On the a-pillar, remove the screws retaining the c-channel to the body of the car.
Remove the channel from the car.
Do this for the b-pillar c-channel as well.
Remove the headliner seal from the t-top assembly.
For this particular job, I’ll be replacing the door to body weatherstrips as well.
A few of these steps will differ depending on the year of your car and if the door to bodies run the entire length of both the A & B pillars.
4-eyed cars will need to remove the dash in order to remove the a-pillar.
This is secured with (5) screws across the front the dash and (4) screws located in the corners of the windshield defrost provisions.
Set the dash aside.
Remove the screws securing the a-pillar trim.
Carefully dislodge the clip(s) from the frontward headliner trim plate.
This can easily bend so be mindful of that.
Remove the a-pillar trim.
This car is missing the kick panel and scuff plate.
These will need to be removed as well.
Loosen and remove any screws that retain the rear interior quarter panel closest to the door opening.
Loosen the T-50 torx bolt securing the seat belt to the car and lay it down.
This will give you enough room to carefully pry back the interior rear quarter panel to remove the door to body weather strip.
Just a friendly reminder, these steps are only applicable if your door to body run the entire length of both the A & B pillars.
At this time, you can remove the door to body weatherstrip.
Make note of its position on the body so you can cut the new one to the correct length.
Go ahead and do the same for the other side.
If you’re wanting to address the frontward roof rail molding, simply remove the screw and gently pull out to remove it from the car.
This can be scuffed and painted along with the rest of the moldings.
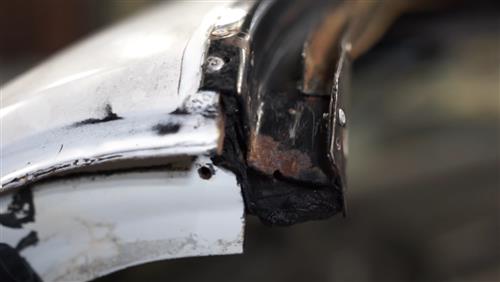
Now is the time to thoroughly clean all areas of dirt, debris and old silicone.
Depending on how involved and detailed you want to get, this can take quite a bit of time.
I started out by vacuuming the t-top area to remove the bulk of the debris.
Compressed air will help to dislodge any loose debris as well.
Carefully scrape any large pieces of adhesive and then vacuum it up.
Once the t-top assembly is clean, thoroughly clean the c-channels as well.
Remove the old foam padding and any existing silicone rubber and set these aside.
To keep with the theme of disassembly and cleanliness, go ahead and remove the (2) screws securing the t-top latch assembly trim to the t-top glass.
Pass the trim over the handle and set it aside.
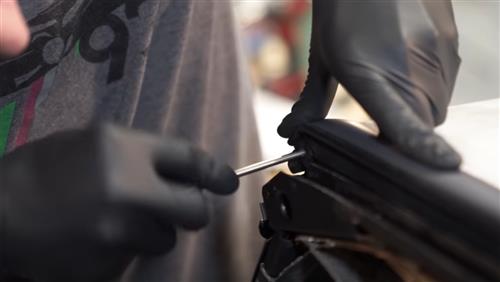
Loosen and remove the (2) small Phillips head screws that retain the weatherstrip to the c-channel.
Remove the old weatherstrip.
Clean any exiting adhesive and/or silicone from both the c-channel and glass.
Do the same for the other t-top glass.
Inspect the foam seal, if you think yours is still in good condition; leave it alone.
If it needs to be replaced, remove the foam if it’s still there and lightly scuff the surface.
Do this for the other latch assembly trim and this will prepare the trim for the installation of the new seal. We’ll come back to this towards the end of the install.
At this time you can inspect and address any areas that may be showing signs of abrasions or rust.
More than likely you’ll have to address a few areas.
Clean away any rust and then paint these areas with a black rust preventive paint.
Allow the paint adequate time to dry.
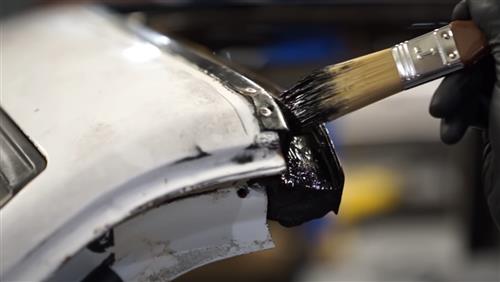
While our front and rear t-top assembly molding were removed from the car, I took the time to thoroughly paint them.
This simply involved scuffing each molding with a scuff pad, wiping them down with a wax and grease remover and then spraying them in the correct color.
Since I’m working on a Capri, the correct exterior color is SVO gray. All other applications will be trim black.
Paint the frontward roof rail moldings if you removed yours.
All of these components were set aside to dry.
Because the center bar on the t-top assembly requires removal of the headliner to access; I prepped it for paint while it was still on the car and then masked the surrounding area.
A few coats of paint did the trick and then the masking was removed.
During all of this, I took a wire brush to all of the Phillips head screws that retain the c-channels.
They were prepped for paint and then painted using trim black.
Using the provided foam tape, install it to the backsides of all (4) c-channels.
Cut it to length and then firmly press the tape to the channel to ensure proper adhesion.
If you’re installing new door to body weatherstrips, go ahead and install them at this time.
I’ve seen the door to bodies installed (2) different ways during the 81 to 88 era.
They either stopped at the ends of the A & B pillar weatherstrip or they ran the length of both the A & B pillar. Not sure which one is correct, but per the t-top service procedure from Ford, they stopped at the ends of the main t-top weatherstrip.
If you’re going this route, you’ll have to pre-install the t-top to body weatherstrip and determine where you need to make your cut.
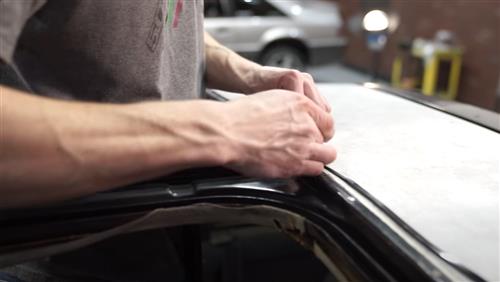
Cut the door to body weatherstrip to length and install it onto the pinch weld.
Fully seat the weatherstrip with the palm of your hand or a soft mallet.
Verify that it fully seats whenever it comes to the corners.
With the door to bodies in place, reinstall the roof rail molding if you removed yours to paint it.
Before installing the c-channels, fill any unused holes with butyl.
When reinstalling the c-channel, simply poke a screw through the foam tape.
Align the correct channel into place and then loosely tighten the screw.
Start the rest of the screws and then fully tighten them down.
Do this for all of the c-channels.
At this time you can fill any open areas around the t-top assembly and c-channels with butyl.
A pry tool will help push the butyl into any openings and mold it to properly fill these areas.
Turning my attention back to the front and rear roof moldings; align the beaded felt weatherstrips with the old weather strip and trim them to length.
Be sure and add a relief cut so that the weatherstrips properly contour to the bend in the each molding.
Peel back the adhesive backing and install the beaded felt weatherstrip to each molding.
Ensure the top of the bead is flush with the top of the molding.
Firmly press the weatherstrip onto the molding to ensure a proper bond.
Carefully poke a hole into the weatherstrip to mark each hole in the molding.
Do this for each molding.
Before installing these moldings, lay down a quarter inch bead of butyl tape where the t-top assembly meets the roof of the car.
Ensure that it runs the entire length of the roof on both the front and rear.
Position the rearward molding onto the car.
Align the rivet holes and then widen each existing hole so that the provided rivets will easily pass through.
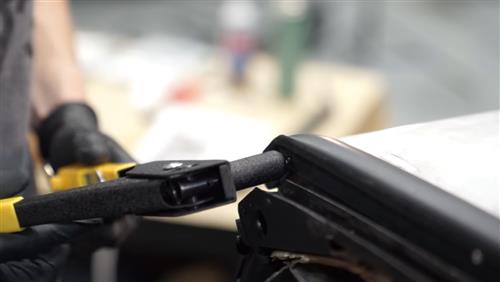
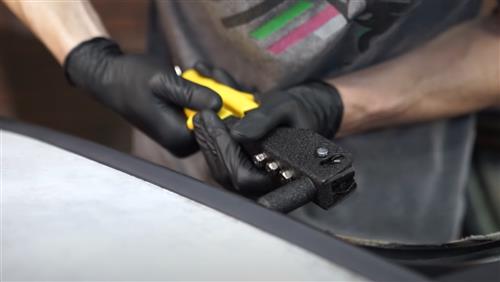
Starting at the corner… position one of the rivets into place.
Pass the rivet gun over the mandrel on the rivet.
Ensure that the rivet is pressed up against the felt… and then squeeze the handle until the mandrel breaks away.
Repeat this for the other (7) rivets that secure the rearward molding to the t-top assembly.
Repeat these same steps for the frontward molding.
Do your best to make sure the rivets that run the length of the t-top channel are flush. Because of the tight working area, it’s difficult to get the head of the rivet gun perfectly parallel with the molding.
Now it’s time to install the main t-top weatherstrip.
Talk about the provided round foam padding.
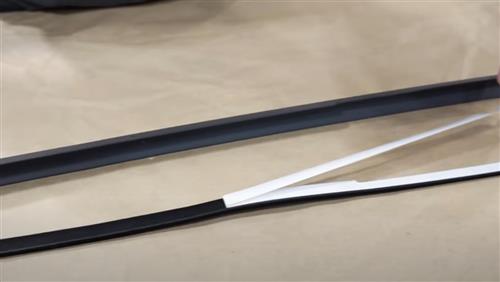
In each package will be a roll of round foam padding.
This is used to fill any void in the main weatherstrip.
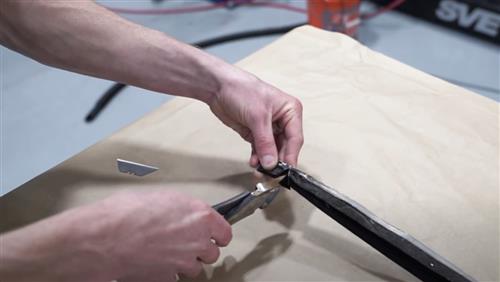
If needed, cut (2) inch and three-quarters pieces.
These will install into the horizontal slit at the top of the b-pillar side.
Push them all the way into the opening and towards the edge of the weatherstrip.
For the a-pillar portion; tape the foam pad to a device that can feed the padding through the weatherstrip.
I simply used an old electric wire.
Bring the padding through the end of the weatherstrip until it can be passed through the horizontal slit at the top.
Bring it through and cut the padding to length.
Tuck it back into the weatherstrip.
Cut the weatherstrip to length at the other end as well.
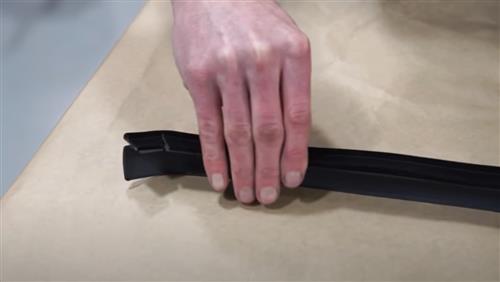
These are side specific and you’ll know pretty quick if you have the correct one.
I find it easiest to start at the b-pillar.
Align the push pin with hole in the body and push it into place.
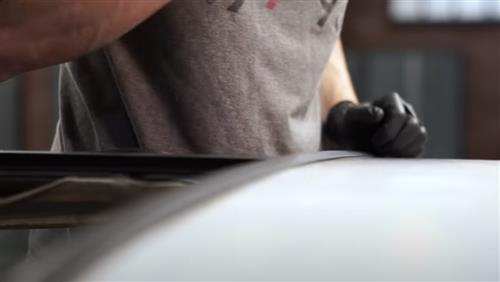
Use a pry tool and carefully seat the weatherstrip into the c-channel.
Work your way around the t-top opening and towards the a-pillar.
Ensure that the weatherstrip fully seats into the a-pillar c-channel.
Roll back the ear closest to the b-pillar.
Apply some black silicone rubber to the ear of the weatherstrip.
Position the ear back into place and keep pressure on this portion with an adjustable bar clamp.
Be sure to not squeeze too hard; you just want to apply a light clamp load with the bar clamp.
Do the same for the frontward ear near the a-pillar.
Do this for the other side.
Allow adequate time for the silicone rubber to fully cure.
In the meantime, you can address the foam latch handle seals.
I would recommend a clear type epoxy that is safe for both plastic and foam materials.
Apply an eighth inch bead of the adhesive to the opening around the latch handle.
Align the foam seal and firmly press with your fingers to ensure a good adhesion.
Do this for the other latch seal if needed.
Once the silicone rubber has cured around the ears of the main weatherstrip, turn your focus on the t-top glass weatherstrip.
These are side specific so pay attention before you rip open the package.
Temporarily install the weatherstrip into the c-channel.
Fully seat it with a plastic pry tool.
Once seated, install the t-top glass back onto the car.
Remember, you have new weatherstrip, so this could be difficult to latch.
Now that it’s latched, verify the position of the weatherstrip.
Make sure that it touches the main weatherstrip on both sides.
If there is a gap on one side or the weatherstrip is deformed from contact; remove the glass and adjust the weatherstrip accordingly.
Whenever it’s adjusted, verify that it’s fully seated into the c-channel.
Roll back one of the ears and apply black silicone rubber.
Position it onto the glass and then use an adjustable bar clamp to hold it into place.
Evenly spread the silicone rubber around the entire ear with your finger.
Do the same for the other ear.
Like the main weatherstrip, the clamps don’t have to be super tight.
Allow the silicone rubber to properly cure.
Remove the clamps.
Reinstall and retighten the (2) small screws.
Position the latch trim into place and reinstall the retaining screws.
Do this for the other t-top glass.
Both t-tops are ready to be reinstalled.
At this time you can reinstall the headliner seals or replace them with brand new ones.
If you replace these, be mindful that they are trim to fit.
After that, you’re good to go.
Replacing t-top weatherstrip is definitely an involved process, but like most things restoration, it’s extremely satisfying once you package it altogether.
Be mindful that the t-top glass may be a little difficult to latch because of the new rubber; this, of course, is completely normal.
If you picked up the t-top book, it does explain proper window alignment and leak testing procedure. It’s an expensive book and totally worth the investment.
Other restoration items that might interest you during this process is the headliner retainer strips and the t-top trim cap kit.
For the most current pricing and product information be sure and check out the product page.
To see more how-to and review videos covering industry leading products, be sure and subscribe to our YouTube channel, like this video, and turn on notifications. While you’re at it, checkout our other videos and for all things 1979 to present Mustang and SVT Lightning; keep it right here with the real enthusiasts, LMR.com!