

SHOP

1979-93 Mustang Parts
Free Shipping on qualifying orders over $99* Details
LMR showroom & will call pickup service will be closed beginning Monday 9/21/26 for renovations until further notice. Need help? Contact Us.

How To Install 1983-86 Mustang Fox Body Window Run Channels

Created by Tyler Rodriquez / 5 min read
Date Created: 8/21/2024
Last Updated: 2/27/2026

Easily replace your worn-out 1983-86 Mustang window run channel trim with these direct replacement run channel trims from 5.0 Resto.

Viewing this install and using the information shared is subject to the terms set forth here - View the LMR Install Instructions Disclaimer.

Replace your 1983-1986 Fox Body Mustang window run channel trim with these factory-style replacements from 5.0 Resto. This trim surrounds the window frame of your door and is needed to properly locate the run channel weatherstrip. Typically, these are mishandled during removal, which results in them becoming bent, dinged, and damaged. 5.0 Resto's trim has the correct channel that allows it to slide onto the window frame and stay securely in place. Your window run channel weatherstrip then slides next to the trim, ensuring your windows are sealed properly.


Manufactured in the factory two-piece design, this trim is a direct replacement for your original. Each aluminum section is precision-built to factory specs for a perfect fit and finish. The long, horizontal trim has the correct end cap by the mirror and the L-bracket to secure it to the vertical trim. That vertical trim has the correct indentation at the bottom, allowing the door belt to overlap for a finished look. Trim black paint is applied to each trim to ensure this window run channel trim kit is the perfect restoration item for your Fox Body Mustang. This trim can also be prepped and painted using the LMR Dark Grey exterior trim paint (linked below).

Fitment Notice:
1979-1982 Mustangs had a slightly different-sized boomerang/upper section of the door frame. This can affect how this window trim installs. You will need to begin the installation by lining up the trim at the front, where the door window frame starts to bend. The hole for the set screw had position variance by year, so it's best to align the trim to your liking before installing the set screw. Due to this variance, there may appear to be a minimal gap where the boomerang trim meets the vertical trim piece.


Product Links

Installation Instructions

Step 1: Prepare The Car

  • Remove Existing Components: Begin by ensuring that the Run Channel weather strips and the side mirror are removed from the car. These need to be out of the way before starting the installation or removal of the Run Channel trim
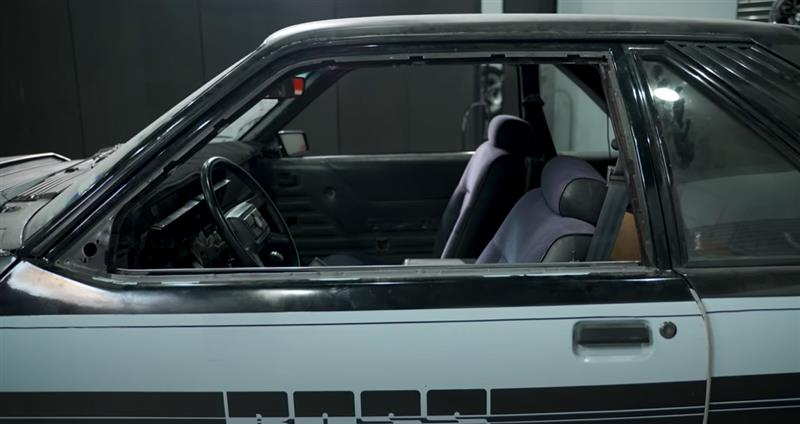
  • Lower the Window: Before proceeding, roll the window down to make the process easier.


Step 2: Remove The Side Mirror

  • Loosen the Adjuster Body: Using a 5/64-inch Allen wrench, loosen the set screw holding the adjuster body to the inside mirror hole cover.
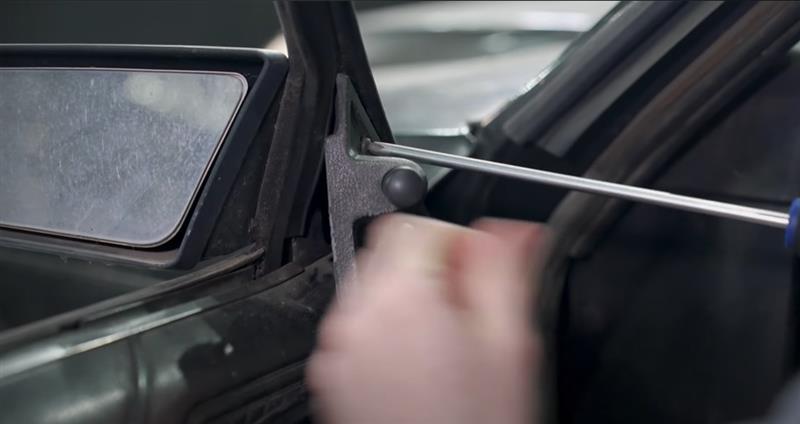
  • Remove the Mirror Cover: Use a Phillips head screwdriver to remove the screw securing the mirror cover to the door. Roll the cover out of the way.
  • Remove the Mirror Assembly: Unscrew the two nuts holding the mirror assembly to the door frame using an 11/32-inch wrench. Push the grommet through and remove the mirror from the car.


Step 3: Remove The Outer Door Belt Weatherstrip

  • Check the Tab Position: On some cars, a small tab holds the weather strip in place. Be mindful of this tab when removing the weather strip.
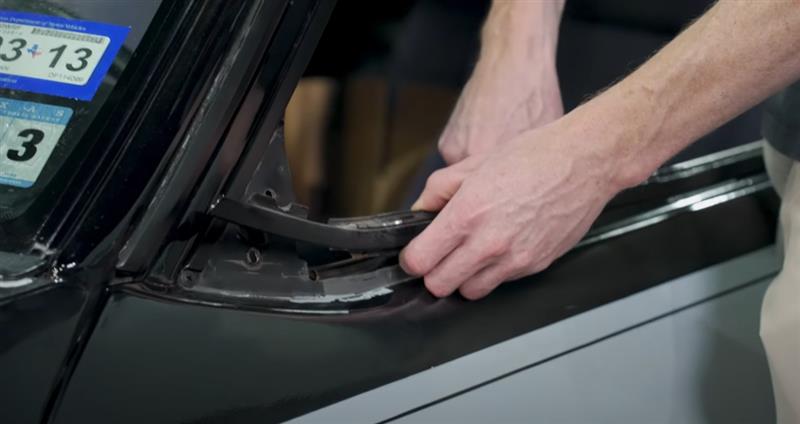
  • Remove the Weather Strip: Starting at the front of the molding, gently pry up the weather strip with your fingers. Work from the closest attaching point to the door frame to avoid bending the strip. Be careful not to scratch any adjacent parts, especially if you're preserving the existing trim.


Step 4: Remove the Run Channel Trim

  • Remove the Front Screw: Locate and remove the Phillips head screw at the front of the Run Channel trim. This screw may or may not be present, depending on the car's history.
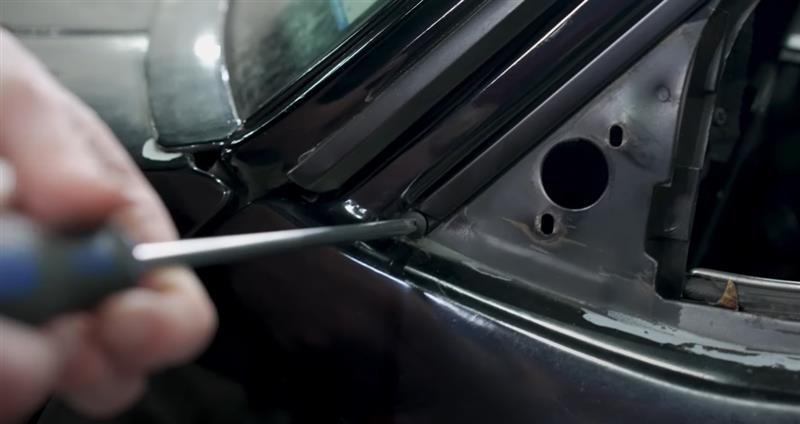
  • Pry the Trim Away: Gently pry the Run Channel trim away from the door frame. Work methodically and avoid rushing to prevent damage.
  • Remove the Trim: Once you've loosened the trim at the corner, pull it away from the door frame and slide it toward the front of the car to remove it from the frame and the L bracket.
  • Remove the Vertical Piece: Repeat the process for the vertical piece of trim. If needed, use a microfiber towel wrapped around a large pry tool to protect the trim and the door frame.


Step 5: Clean and Prepare the Door Frame

  • Clean the Door Frame: Use a microfiber towel and an all-purpose cleaner to clean the door frames. For painted body color frames, consider polishing them with a compound polish or cleaner wax to restore their shine.
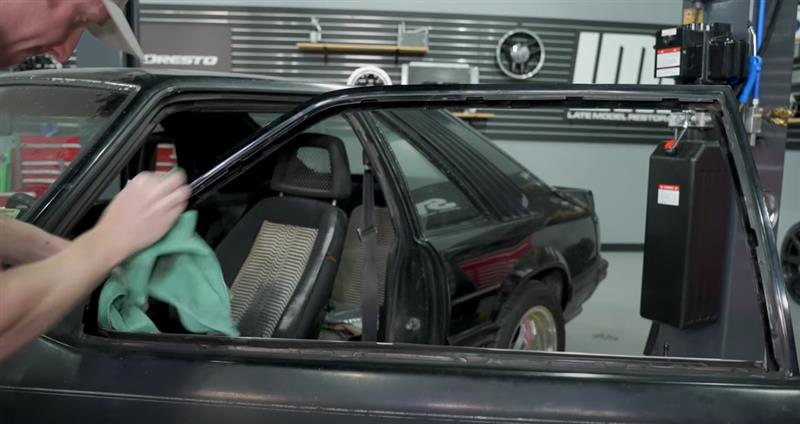
  • Paint Touch-Ups (Optional): If necessary, refinish the door frames using LMR exterior dark gray paint, especially for 1985-1986 GTs and SVOs with matching trim.


Step 6: Reinstall the Run Channel Trim

  • Install the Vertical Piece: Begin with the vertical piece of the Run Channel trim. Remove the L bracket from the larger Run Channel trim and attach it to the vertical piece. Align it with the corner of the door frame and gently press it into place.
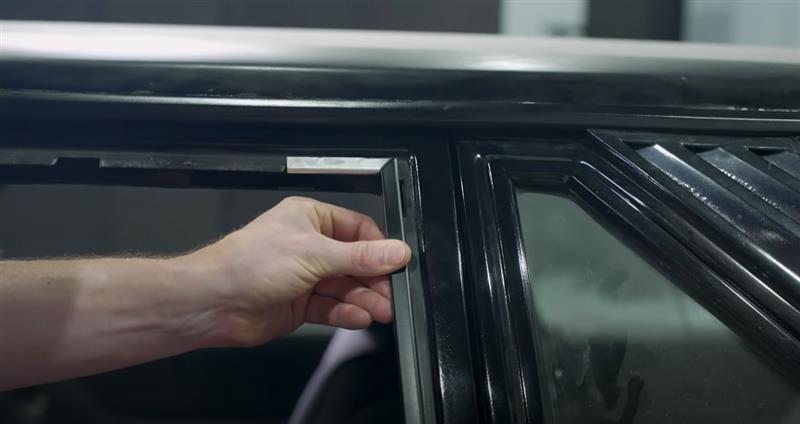
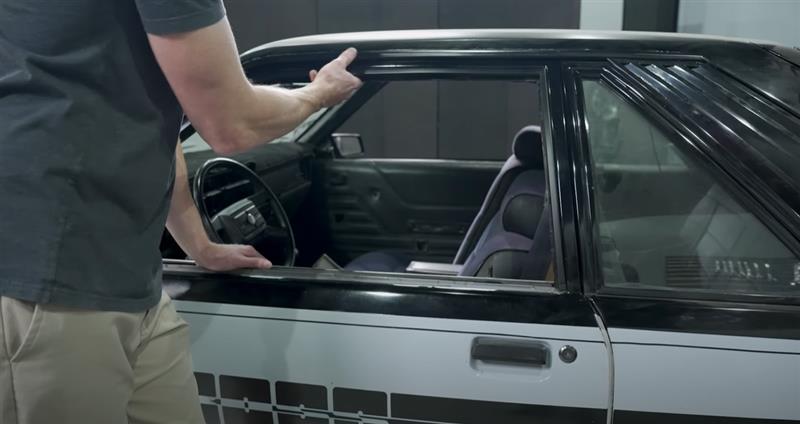
  • Install the Larger Section: Insert the larger section of trim at an angle, ensuring it engages with the L bracket. Slide it toward the rear of the car and press it onto the door frame. Use the palms of your hands to fully seat the trim. Reinstall the front screw to secure it in place.


Step 7: Install The Run Channel Weather Strip

  • Apply Dish Soap: Apply a small amount of dish soap to the back of the new Run Channel weather strip to make installation easier.
  • Install the Weather Strip: Seat the weather strip into the channel in the door frame. Ensure it is fully and securely in place.
  • Repeat on the Other Side: Repeat the process on the other side of the car.


About the Video

1979-1986 Fox Body Mustang: 5.0 Resto Window Run Channel Trim - Overview & Install

Check out our YouTube channel for even more tech tips, installation videos, how-tos, and more. The best place to go for anything Mustang related!

Published on 2024-08-16
Replace your 1979-1986 Fox Body Mustang window run channel trim with these factory-style replacements from 5.0 Resto. This trim surrounds the window frame of your door and is needed to properly locate the run channel weatherstrip. Typically, these are mishandled during removal, which results in them becoming bent, dinged, and damaged. 5.0 Resto's trim has the correct channel that allows it to slide onto the window frame and stay securely in place. Your window run channel weatherstrip then slides next to the trim, ensuring your windows are sealed properly.

Manufactured in the factory two-piece design, this trim is a direct replacement for your original. Each aluminum section is precision-built to factory specs for a perfect fit and finish. The long, horizontal trim has the correct end cap by the mirror and the L-bracket to secure it to the vertical trim. That vertical trim has the correct indention at the bottom, allowing the door belt to overlap for a finished look. Trim black paint is applied to each trim to ensure this window run channel trim kit is the perfect restoration item for your Fox Body Mustang. This trim can also be prepped and painted using the LMR Dark Grey exterior trim paint.
Thumbnail image of the author of this article, Tyler Rodriquez.

About the Author

Tyler has written content for Late Model Restoration for nearly 8 years, producing over 300 articles. As an avid New Edge fan, Tyler has owned 4 2004 Mustangs and an 88 Convertible Fox Body. Read more...