About the Video
How To: Fox Body Mustang R12 to R134A A/C Conversion (1983-1993)
Check out our YouTube channel for even more tech tips, installation videos, how-tos, and more. The best place to go for anything Mustang related!
Published on 2017-07-03
1983-1993 A/C Conversion Kits: http://latemodelres.to/ACconversionKits_YouTube
How To Charge Your Mustangs A/C: https://youtu.be/vMwjFXyuyfY
5.0 Resto Factory Style R134a A/C Conversion.
Ensure your 1983-1993 Mustang's air conditioning system is functioning at full potential with this factory style R134a conversion system. The factory hoses and components are most likely dry rotted or defective by now. Between the age of your factory A/C system and the hassle of getting R-12 refrigerant, the answer is to convert to R134a refrigerant.
R134a Refrigerant.
Converting from R12 to R134a freon is becoming more and more common. Simply because the R134a refrigerant is cheaper, readily available, and can be bought without a license. Unfortunately, when R134a is introduced into a stock R12 system with nothing more than a few new seals and some oil (like the popular R-134a conversion kits you see at the parts store), the A/C system isn't as efficient and vent-outlet temperatures rise. The best way to repair your A/C system and properly convert to R134a is to replace the components that have been using R12 for all of these years.
Complete Conversion Kit.
Your factory hoses and other a/c components are most likely rotted or leaking by now. This kit includes new hoses, condenser, and a re-manufactured compressor. This ensures you don't have any components with R12 residue left in the system. The compressor includes the correct fittings and service ports to accept R134a refrigerant/freon.
Installation Note:
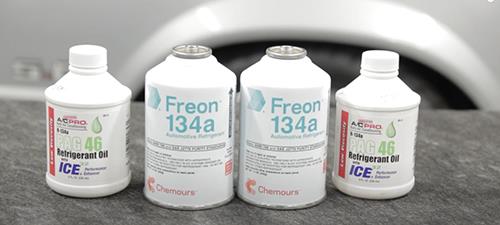
- The compressor ships dry, meaning it has no oil. The compressor needs to be filled with 10oz of PAG 46 oil and 24oz of R134a refrigerant.
Fitment Notes:
- Will only work on Mustangs equipped with A/C from the factory. -
- Dealer installed A/C or non-A/C equipped Mustangs will not work.
YouTube: https://www.youtube.com/user/latemodelrestoration?sub_confirmation=1
Facebook: http://www.facebook.com/latemodelresto
Instagram: http://instagram.com/latemodelresto
Twitter: http://twitter.com/latemodelresto
#LMR #50Resto #FoxBody
Use of this video is subject to the terms as set forth in our LMR Install Video Disclaimer | https://lmr.com/page/lmr-install-video-disclaimer
Transcript
What’s up everybody? Landan with LMR.com. If converting to R134A from R12 has ever crossed your mind, you’re in luck. This video will cover my brief overview on what the 5.0Resto kits are going to contain and how you install one into your car.
Without going into all of the details about R12 and R134A systems, know that R134A replaced R12 in automotive air conditioning systems in 1994. That means every Fox Body equipped with factory A/C has an R12 system.
Thanks to industry leader 5.0Resto, converting to R134A is extremely easy and straightforward. Their systems are engineered for three separate year ranges; which include 83 to 85, 1986 only and of course 87 to 93 Fox Mustangs.
Each kit will contain a condenser, accumulator, a re-manufactured compressor, evaporator to condenser line, compressor discharge line, a clutch cycling switch and manifold service attachment ports.
Now, without getting into a debate on whether or not you can put R134A refrigerant into an R12 system, this video is intended to instruct DIY-minded enthusiasts on how they can install a premium 5.0Resto R134A conversion kit into their Fox Mustang.
Before you install this kit, have a licensed HVAC technician use the proper tools to empty the current system. Also, be sure and pick up at least ten ounces of PAG 46 oil and twenty-four ounces of R134A refrigerant.
With the A/C system completely empty, go ahead and disconnect the negative battery cable.
Remove the air inlet box.
Use a break over bar and appropriate socket to release tension on the tensioner so you can remove the serpentine drive belt.
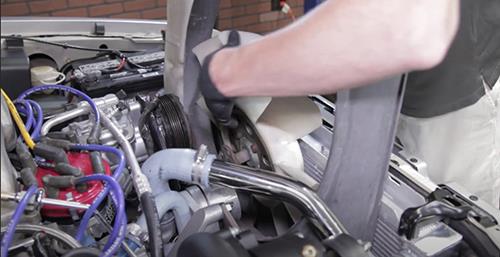
Remove the four, seven-sixteenths bolts that retain the fan clutch and water pump pulley to the water pump.
A small pry bar maybe needed to help keep the assembly from rotating.
At the top of the radiator, loosen and remove the two 11mm bolts securing the fan shroud to the radiator.
Before removing the fan and shroud assembly, disconnect the low coolant sensor electrical connection if equipped.
Slide the fan clutch off the water pump shaft and then lift up on the fan and shroud.
Set the fan aside and then remove the overflow hose from the radiator that is located underneath the cap.
Now you can remove the shroud from the car.
Remove the two radiator hold down bracket bolts with a 10mm socket and then set the brackets aside.
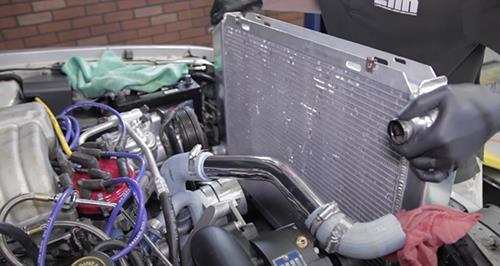
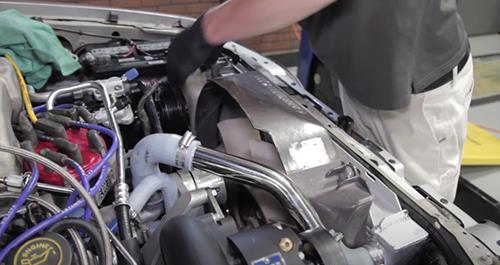
Since this car has a larger radiator and Vortech supercharger on it with an extended crank pulley; I’m going to remove the radiator for more work room and for you guys to have a better understanding on how to remove the condenser. Radiator removal may not be required for your application.
Position a drain pan or bucket underneath the drain plug.
Loosen the upper radiator hose or remove the cap to vent any pressure that may be in the system.
Let enough coolant run out so you can then remove the upper radiator hose and position it out of your way.
Now remove the lower radiator hose and have the drain pan or bucket ready to catch the coolant.
Let it drain to a slow drip and then remove the radiator from the car.
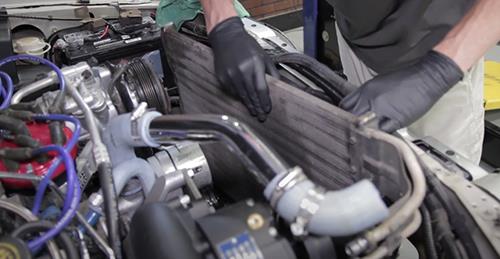
Use a push pin removal tool to remove all of the harness clips from the back side of the core support.
Now remove the two condenser bracket retaining bolts with an 8mm socket.
Before disconnecting the two lines, remove the two safety clips.
Use the correct diameter spring lock tool on each line to disconnect them from the condenser.
Remove the upper bracket from the condenser and then remove the condenser from the car.
Disconnect the compressor electrical connection.
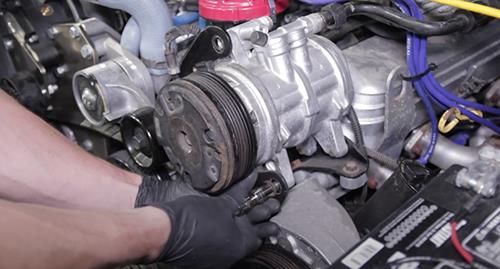
Use a crescent or open end wrench to loosen the high and low pressure lines from the compressor.
The compressor to condenser line can now be removed from the car.
To remove the compressor, loosen remove the three retaining bolts on the front bracket.
Then remove the two rear bolts that secure the stamped steel bracket to the cast bracket attached to the engine block.
Lift up on the compressor, remove the accumulator line and then set the compressor aside.
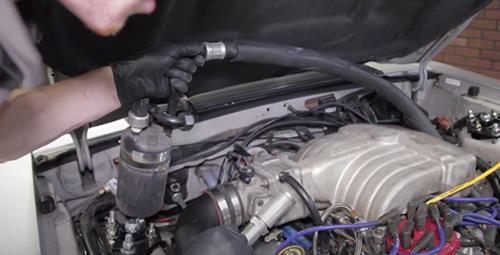
Use an open end wrench or crescent wrench to loosen the fitting on the accumulator to evaporator line.
Remove the safety clip from the evaporator to condenser line.
Disconnect the electrical connection.
Loosen the 8mm bracket bolt to relieve tension from the body of the accumulator.
Once you have enough room, remove the accumulator from the car.
Use a spring lock tool to disconnect the line from the evaporator.
Remove the line from the car.
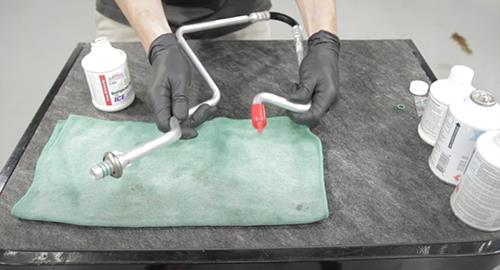
Place the new evaporator to condenser line on a work bench.
Remove one of the caps and make sure the other end is still capped.
Pour approximately one ounce of oil into the line.
Lightly lubricate the o-rings.
Recap the line so when you go to install it you don’t have oil running all over the place.
Reposition this line back into the car.
Remove the cap and then connect the line to the evaporator.
Push in until you hear or feel a click.
Gently pull out on the line to make sure it is locked into place.
Place the accumulator on a work bench.
Remove the protective cap from the accumulator and verify that the o-ring is present and that it is lubricated.
Install the provided cycling switch and hand tighten for now.
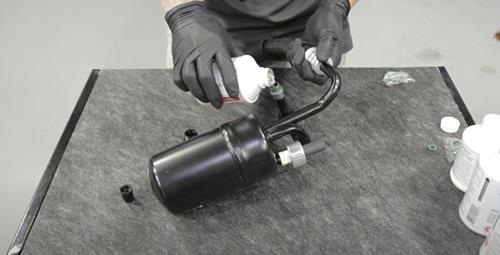
Position the accumulator on its side and remove the cap.
Make sure the opposite end as capped off.
Verify that there is an o-ring on the line and then pour approximately one ounce of oil into the accumulator.
Lightly lubricate the o-ring.
Install the accumulator into the bracket.
To align the accumulator with the evaporator lines, you may have to widen the hold down bracket.
Install the hard line into the evaporator and then loosely thread the fitting.
Then tighten it down with an open end or crescent wrench.
Now you can carefully tighten down the cycling switch and then plug in the electrical connection.
On the old compressor, remove the bracket by removing the two 13mm retaining bolts.
Install the bracket onto the new compressor and retighten the previously removed hardware.
Before continuing, verify that your compressor is pre-filled with oil.
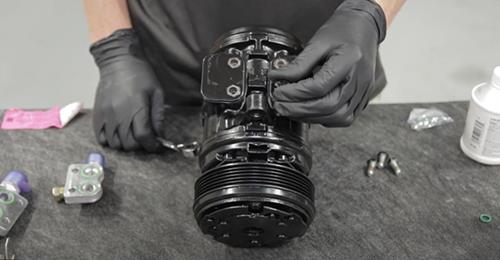
Remove the four bolts that secure the two port covers.
Set them aside and then wipe down the mating surface.
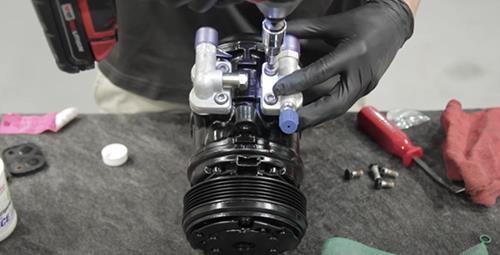
Lubricate the o-rings on both of the provided manifold service ports.
If your compressor was not pre-filled, go ahead and add approximately three ounces of oil.
Remove the factory attachment port retaining hardware.
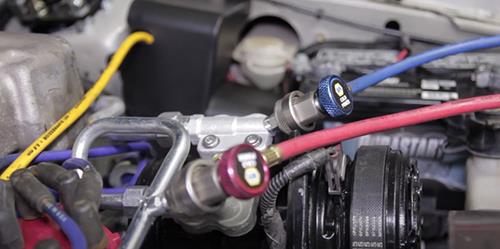
Position the service attachment with the pressure release valve onto the correct side of the compressor.
If you’re looking at the compressor from the clutch side, this attachment will be positioned on the left side.
Loosely tighten the hardware.
Now position the service attachment with the charging port on the right side of the compressor.
Loosely tighten the hardware.
Now you can progressively tighten down the hardware.
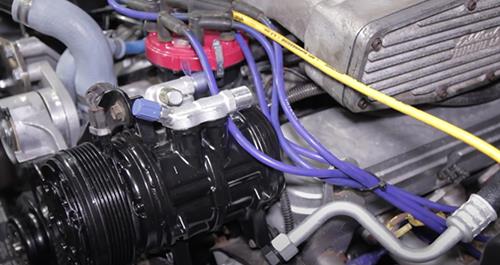
Position the new compressor into the car and start all of the previously removed bolts before fully tightening.
There were two in the back and three in the front.
Fully tighten the hardware and then reconnect the electrical connection.
Remove both the cover and cap from the attachment port and accumulator to compressor line.
Verify that there is in o-ring in place and lightly lubricate.
Position the line into the attachment port and loosely tighten the fitting.
Fully tighten the fitting with an open end wrench or crescent wrench.
Position the new compressor to condenser line into the car.
Remove the cap and verify that there is an o-ring in place.
Lightly lubricate and then install the line into the attachment port.
Loosely tighten the fitting by hand and then fully tighten with an open end wrench or crescent wrench.
Unscrew the preinstalled cap.
Verify an o-ring is present and lightly lubricate it.
Then remove the valve stem from the Schrader valve.
Screw on the provided fitting and then tighten it down.
Place the condenser on a work bench.
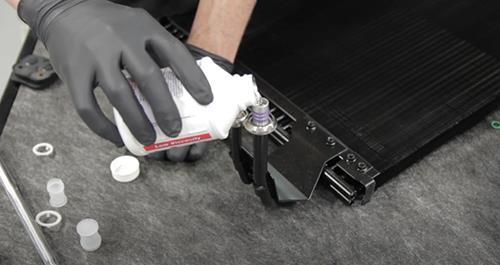
Remove the caps and plastic rings.
Pour approximately one ounce of oil into the larger line and then reinstall the caps.
Position the condenser into the car and make sure it properly seats onto the rubber pads.
Reinstall the previously removed upper brackets and retighten the hardware.
Reinstall the convoluted tubing back onto the core support.
Remove the caps from the condenser and lubricate the o-rings.
Install both lines into the condenser.
Because of the size differences, you won’t get these backwards.
Reinstall the radiator and reposition the lower radiator hose.
Retighten the hose clamp.
Reposition the upper radiator hose and then retighten the hose clamp.
Reinstall the fan and fan shroud back into the car.
Retighten the fan clutch to water pump bolts.
Reinstall the upper radiator brackets and serpentine drive belt.
Reposition the safety clips and tighten the accumulator hold down bracket.
Then, reinstall the air box and reconnect the negative battery cable.
Remove the radiator cap and top it off with fresh coolant.
Go ahead and take this time to double check your work.
To continue watching the best Fox Mustang videos, be sure subscribe to our YouTube channel if you haven’t already done so. These premium 5.0Resto R134A conversion kits are available from the real Fox Mustang enthusiasts, LMR.com!