SHOP

1979-93 Mustang Parts
Free Shipping on qualifying orders over $99* Details
LMR showroom & will call pickup service will be closed beginning Monday 9/21/26 for renovations until further notice. Need help? Contact Us.

1979-93 Fox Body Mustang SVE High Torque Mini Starter Install & Troubleshooting Guide

Created by Jay Walling
Date Created: 7/29/2016
Last Updated: 5/15/2026

Follow along as we show you how to replace your worn-out Fox Body Mustang starter with the SVE Mini High Torque Starter.

Viewing this install and using the information shared is subject to the terms set forth here - View the LMR Install Instructions Disclaimer.

Installing a high-torque mini starter in your Fox Body Mustang is a great way to improve reliability, reduce weight, and ensure strong, consistent starts, especially on modified or high-compression engines. This step-by-step guide walks you through the complete installation process of the SVE Mini High Torque Starter, designed specifically for 1979–1993 Mustangs. Whether you're upgrading from a stock unit or replacing a failing starter, this detailed how-to includes the tools you'll need, wiring modifications, and helpful visuals along the way. Follow these instructions to complete your install confidently and get your Mustang back on the road with peace of mind.


  • Fits: 1979–1993 Fox Body Mustang
  • Skill Level: Intermediate
  • Install Time: 1–2 hours

Product Links:


Tools Required:
  • Floor Jack
  • Two Jack Stands
  • 3/8" Drive Ratchet Wrench
  • 3/8" Drive Extensions
  • 9/16" Socket
  • 1/2" Socket
  • 3/8" Socket or Wrench


Installation Instructions

Step 1: Remove Old Starter

  • Start by removing the negative battery cable.
  • Raise the vehicle securely with jack stands.
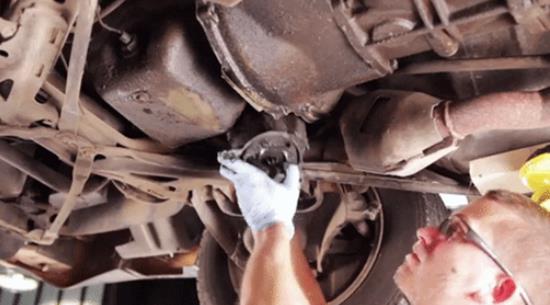
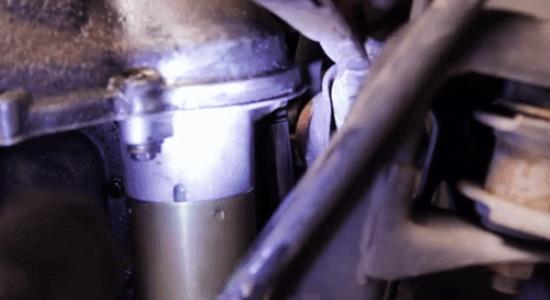
  • Remove the two starter retaining bolts using the appropriate socket.
mustang-starter-install-sve-mini-high-torque_dfbc8c95.jpg (550×305)

Step 2: Remove Starter Wiring

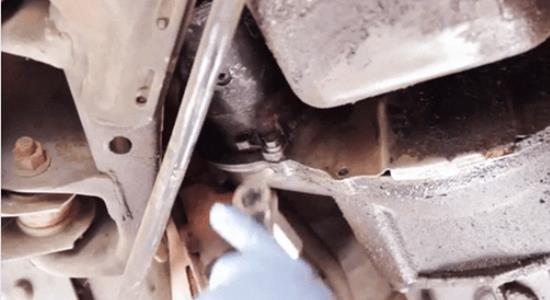
  • Slide the starter slightly to access the starter power wire through the K-member.
  • Remove the retaining bolt and disconnect the power wire.
  • Carefully slide the starter out of the car.
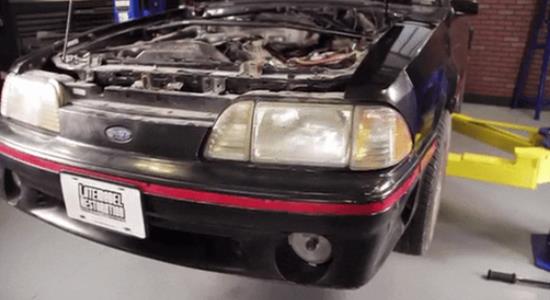
mustang-starter-install-sve-mini-high-torque_5dc0ca77.jpg (550×300)


Step 3: Modify The Starter Solenoid Wiring

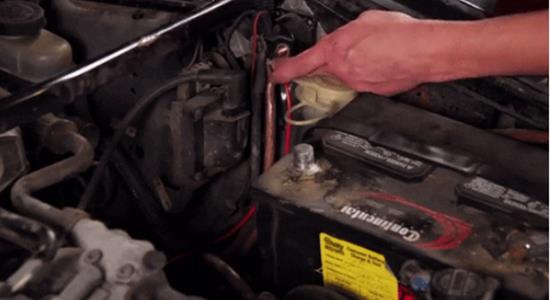
  • Access the apron-mounted starter solenoid in the engine bay.
  • Move the starter power wire to the same terminal as the battery positive cable.
  • Connect the included trigger wire to the now-open relay terminal.
mustang-starter-install-sve-mini-high-torque_a2206286.jpg (550×300)


Step 4: Route Trigger Wire

  • Start by removing the negative battery cable.
  • Run the new trigger wire along the existing starter power cable down to the starter area.
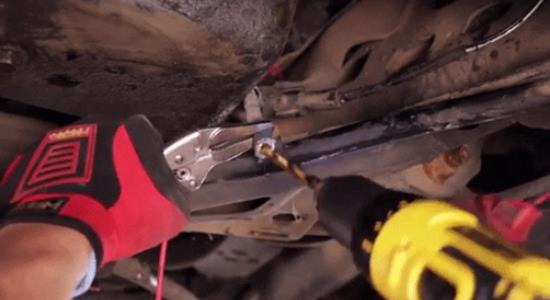
  • If you're using a stock starter cable, drill out the eyelet using a 3/8" drill bit to fit the new starter stud.
mustang-starter-install-sve-mini-high-torque_253a7907.jpg (550×300)

Step 5: Install New SVE Starter

  • Start by removing the negative battery cable.
  • Slide the new starter into place under the car.
  • Connect both the starter power wire and trigger wire through the K-member.
  • Position the starter correctly in the bell housing and reinstall the two retaining bolts.
mustang-starter-install-sve-mini-high-torque_c1f1e126.jpg (550×300)


Step 6: Test For Operation

  • Lower the car back to the ground.
  • Reconnect the negative battery terminal.
  • Start the vehicle to verify proper operation.
  • After this, you are good to go.
mustang-starter-install-sve-mini-high-torque_4f80913e.jpg (550×300)


About the Video

Fox Body Mustang SVE High Torque Mini Starter Install (1979-1993 5.0L/5.8L)

Check out our YouTube channel for even more tech tips, installation videos, how-tos, and more. The best place to go for anything Mustang related!

Published on 2013-08-01
Upgrade the starting system on your 1979-1993 Mustang to the factory-style mini starter found on the later model Mustangs. This SVE Fox Body Mustang high-torque mini starter is the perfect replacement for a malfunctioning starter. An easy upgrade to your Fox Mustang, this SVE starter is just 8.5 lbs and more powerful than the originals used on 1982-1991 5.0 Mustangs. Plus, we supply you with the necessary wire and instructions to make this swap a snap! Working on both automatic and manual transmissions using 157 or 164-tooth flywheels, this starter fits multiple applications. Because these are brand new (not remanufactured) high torque starters, there is no core required. Sold outright to save time and make it easier for you! Help restore your Mustang with this new replacement from SVE!
Transcript
JONATHAN MCDONALD: '79 to '91 Mustang 5.0s were cursed with this ginormous starter. Not only is it big, but it's heavy too, weighing in at 5.7 pounds. The power output is antiquated at best. And the way it's wired, the fender mounted relay, or solenoid carries the full current, causing it to fail quite often.

In 1992, Ford introduce the PMGR, or Permanent Magnet Gear Reduction Starter, commonly known as a High Torque Mini Starter. This type of starter has an internal gear reduction drive that allows it to increase torque output while reducing current draw. This means it can crank stock engines with ease and even handle high compression engines.

Another feature is it carries its own heavy duty solenoid, allowing you to change the wiring and take that current load off of the apron mounted starter relay. Finally , it's significantly smaller, allowing for increased header clearance. And it only weighs 3.6 pounds.

Our SVEPMGR Starter features all of these benefits plus a limited lifetime warranty. It is a direct replacement for '92 to '95 Mustang 5.0s and is a bolt-in upgrade for '79 to '91 5 liters. Many people ask, how difficult is this upgrade to install? Well, it's not much more involved than a simple starter swap.

The first thing to do is pick up your SV Starter at latemodelrestoration.com. We include the needed trigger wire to piggyback along your starter power wire. But let's say you're in need of new starter cables. Well, we've got covered with our 5.0 Resto Starter Cable assembly.

Begin by disconnecting your battery. Raise the car and remove the two starter retaining bolts. Slide it to where you can access the starter power wire retaining bolt through [? the cane ?] member. And go ahead and remove it. And slide the starter out of the car.

If your Mustang is filthy mcnasty like ours, take a few minutes and run up to the car wash and give it a quick clean up. You'll love yourself for it later. Access the apron mounted starter solenoid and move the starter power wire to the same terminal as the battery positive cable. Slide the ring eye of the included trigger wire over the now open relay terminal.

Run the trigger wire along your existing starter power cable down into the starter area. If running a stock starter cable, you will lead to enlarge the eyelet hole with a 3/8 inch drill bit. Slide your new starter into place and position it to where you can connect the starter power wire and the trigger wire through [? the cane ?] member. Position the starter in the bell housing, and reinstall the two retaining bolts. We'll lower the car, reconnect your battery, and test for operation. Go out and enjoy your new SVE Starter.

Thumbnail image of the author of this article, Jay Walling.

About the Author

Jay has written content for Late Model Restoration for over 10 years, producing over 120 articles. Jay has an extensive 25-plus-year background in automotive and is a certified Ford Technician. Read more...